Tag Archives: Homebrew

Glycol Chiller Build

Glycol Chiller

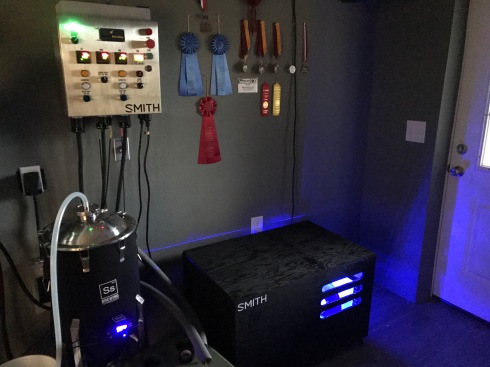
Finished Glycol Chiller made from an Air Conditioner

After getting fed up with constantly adding ice to my cooler, I decided that my next homebrewing upgrade would be to glycol. I didnt want to spend $1000 on it though. So I went with a much cheaper option, I built my own. The concept is pretty straight forward. Use the condenser from the AC unit to chill a bath of Glycol.


The Build.

I bought a brand new 5,000 BTU AC unit from WalMart for $97.IMG_0422

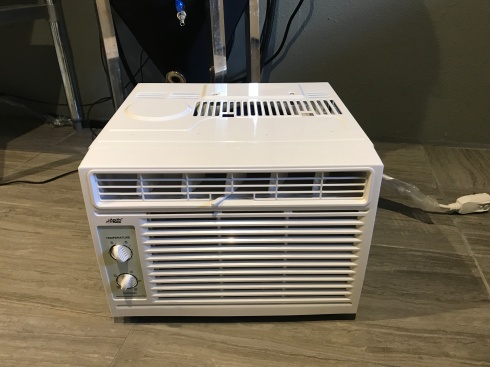
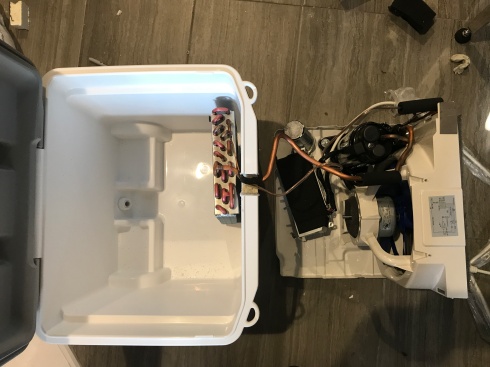
You can find them on Craigslist for cheaper, but I didn’t want to have to go through that hassle. So after you get your AC, take it apart. The outer housing unscrews and pops off pretty easily.

IMG_0423

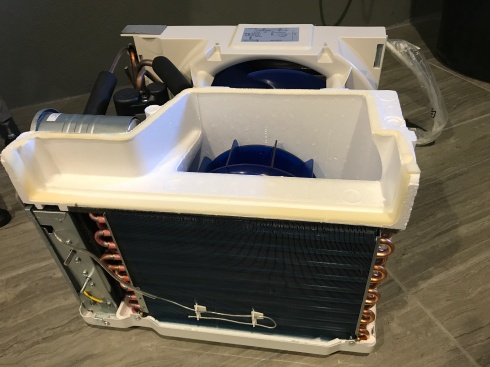
Remove the upper styrofoam and unclip the Thermometer from the Condenser. Next I unscrewed the control box to get it out of the way.

Now Comes the fun part. I moved the condenser away from the inner fan. I just gently and slowly pulled the copper tubing to allow enough working room.

IMG_0426

Use a hacksaw and trim the fan spindle, you dont want to have a fast spinning axle just hanging out there, and it takes up room.

Move on to the the control box.

IMG_0424

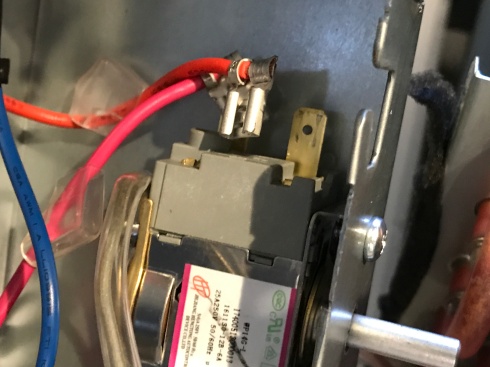
We need to bypass the Thermostat, It’s the one with the thermometer attached to it. Make sure it is set to max cold. Take the two wires running to the thermostat control and splice them together. Close back up the control box.

IMG_0425

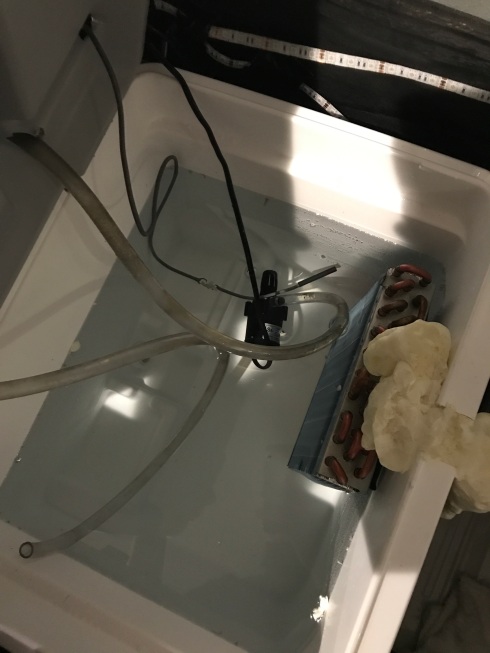
Back to the Condenser, Figure out how you want it positioned and how it will fit into your cooler. I’m using a 52qt tall cooler. Start pulling and moving the condenser into position. Just be slow and watch how moving one piece affects another piece of copper further down the line. As long as you go slow and carefull you will have no problems. Also, Be gentle with the condenser fins, they bend very easily. It’s not a big deal but you want to maximize surface area.

IMG_0440


Use your hacksaw again and cut a notch out for your coil. You’re essentially done with the basic build. I suggest you at least mount the whole thing on a piece of plywood so it’s easier to move around. I wanted to enclose mine so it looks cleaner in the brewery.

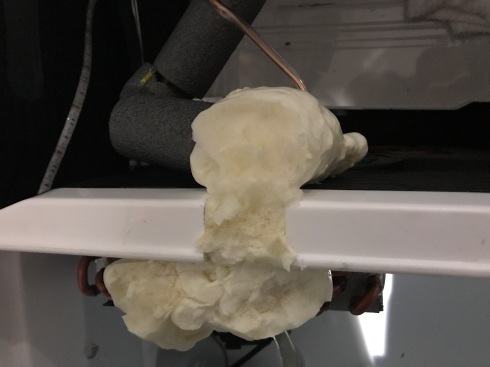
Once your happy with the placement of the condenser, Fill the gap with expanding foam. Let it dry and clean it up so the lid will close on the cooler.

image


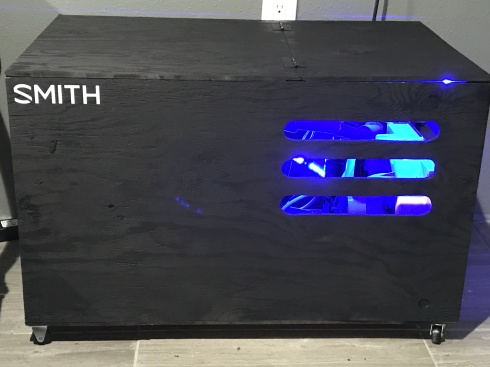
I built a simple box for mine using plywood. I cut out some vents for airflow for the A/C with a Jigsaw, attached some casters so I could wheel it around the brewery easily, and to make it look super cool, some LED lights (they change color too)

image

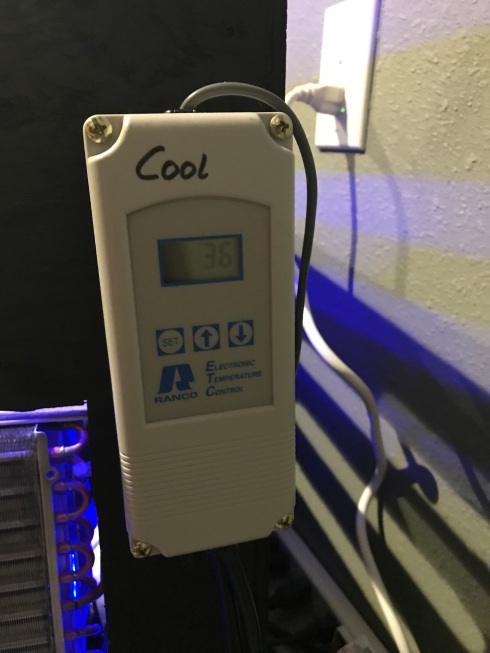
Use an external temp controller like and Inkbird or Ranco, route it’s temp probe to the cooler to run your chiller.  I set my controller to 36 degrees, but it can go much colder.


imageDrill some holes in the top of the cooler for the glycol hoses for your fermenter  Wrap them in pipe foam insulation to prevent sweating

image


Glycol

IMG_0505

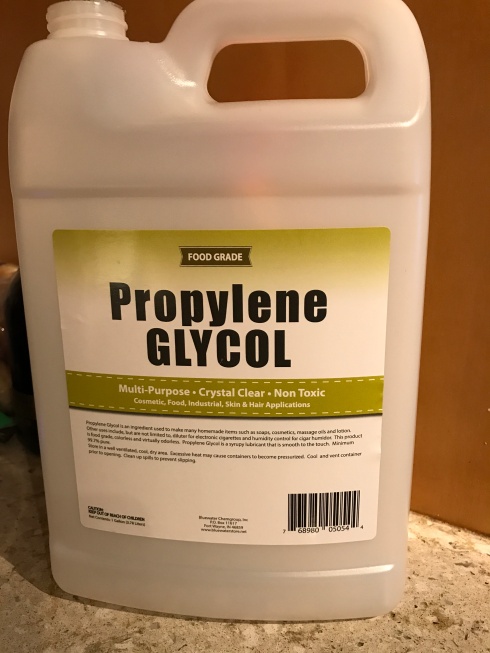
I bought two gallons of Glycol on Amazon. The cheapest I found was $25 a gallon.

I mixed 2 gallons of glycol with 6 gallons of water.


Here’s a quick dumb video of the Chiller.


IMG_0488

Parts and Prices

Air Conditioner       $97 Wal Mart

Cooler                       $40  Home Depot

Plywood, Paint, Casters, Foam       $50

Glycol                $50 Amazon

LED’s                $20 Amazon

$260 Total

Thanks for reading and feel free to ask any questions about the build.


Toasted Oatmeal Stout

Sensing that I was running perilously low on my Chocolate Coffee Stout in the keezer I had no other choice but to spend my day off brewing up an Oatmeal Stout. I consider it a heinous beer crime to not have a steady supply of stout on hand during the winter months. Having a dark glass of smoothness is comforting on a cold winters day and to go without is a thought that I just can’t bear.

So I got to work, with a freezing fog layering my valley and a slippery deck beneath my feet, I lit my strike water and hurried back inside for the long wait of 40 degree water slowly heating to 168. In this time I pulled out the main star of my Stout, the Flaked Oats. Now a trick I learned some time ago is to toast your oats in the oven before going in the mash. I put mine in at 300 degrees and let them roast for about 30 to 40 minutes until they are golden brown and smelling awesome. I have found that by doing this it makes your Oatmeal Stout a little more Oatmeal Cookie like in aroma and flavor. Perfection in my book.

The rest of the brew day went with off without a hitch. One bit of advice though…When brewing outside in sub-freezing tempatures, Don’t neglect your hose!!!! Every half hour or so I will run fresh water to purge the line to avoid ice build up. Before I knew this trick I went to run my imersion chiller and I got nothing due to a frozen hose. Nobody wants a frozen hose.

Get the Recipe

This slideshow requires JavaScript.


Pairs Well With Lembas Bread, A Hobbit Sauce IPA Tasting

Hobbit Sauce IPA using all New Zealand Hops.

Yay! It’s done and it’s pretty good. The aroma came out a little lighter than I had hoped but it still smells nice. It has a yummy fruity mellony Honeydew aroma. On the malt side it has a toasty carmel light maltyness and finishes out super dry and make you thirsty for another one. The London Ale yeast really brings out the malt character and gives it a smooth flavor.  This is probably one of the best balanced beers I’ve made and I’m excited to enter it in the IPA Hop Madness Comp next week.

Link To Recipe


Kegging Under Pressure

Kegging my beer is the best thing I have ever done. It’s just one container to clean and sanitize versus 54 bottles.

This slideshow requires JavaScript.

It’s super quick and easy but I still stress out over kegging. In fact I put it off as long as I can. It’s nerve racking to put my beer through the potentially devastating process of kegging. I have spent so much time lovingly nurturing my beer to this point. It’s sat happily in it’s temperature controlled environment, free from oxygen and light. The yeast cake sits undisturbed and the beer is crystal clear. As soon as I move it I have to trust that all the steps I took a month prior have been enough to ensure the best quality beer. ( I have issues, I know)

 I’m up against the clock, so last night I had to keg Hobbit Sauce. The beer comp is a couple of weeks away and if its going to be ready I was going to have to do it. My paranoia of course was unnecessary. Everything was just fine. Kegging is super simple but I was still nervous about the first taste of the new recipe

Well… Great Success!

The final gravity came out at 1.009 It’s nice and dry, the aroma is fantastic and it’s well balanced. I’ll have more detailed tasting notes after its been carbonated. But I think we have a winner here folks. I’m going to rebrew it for NHC.